Reserving a Room in Outlook 2013 or 2016
Ed Center rooms can easily be reserved for meetings in Outlook 2013 or 2016. Follow these steps to create a meeting with a reserved room.
1. Click Calendar in the bottom-left corner of the window (if necessary).
2. Click New Meeting in the Home Tab on the ribbon.
3. Click the Rooms... button in the New Meeting window.
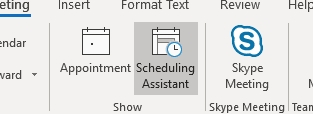
You can also click on the Schedulng Assistant to allow you view available times

4. Find the room you wish to reserve, select it, and click OK.
5. Provide all other necessary details for the meeting (other attendees, date/time, notes, etc.) and click Send to schedule the meeting, reserve the room, and send out invitations.
NOTE: Not all rooms are managed the same way:
- Some will reply automatically to your reservation (i.e., accept or decline) based on the room's availability.
- Others will mark the room tentative until it is approved by the room's manager(s).
Brent Richburg
806-293-6075
806-293-6075


